The Best Fire Starting Kit You Can Make
Making a fire is among the most important outdoor skills to know how to do and it is also a favorite of mine.
A quick internet search will reveal a ton of different methods for starting a fire, especially as it relates to a survival situation. A few of them are great, most are okay, and the rest should be left in your mental toolbox as a last-ditch, “hack”, option.
As I already stated, I love making fire and thoroughly enjoy practicing different methods to start it. There is however a big difference in the techniques that are practiced for fun versus what should be in a fire kit.
For example, I enjoy practicing friction fire methods such as a bow drill. But my fire kit does not consist of the elements needed to construct one.
Sure, I have items among my pack that could be used to construct a bow drill, not to mention naturally sourcing out all the materials, but that is one of the last tools I would want to use in a survival situation.
I think if everyone were honest with themselves as well as others, they would say the same thing.
A survival situation is well, serious because your life is on the line. In such a situation nobody willingly uses inferior tools and methods unless they are forced to, which means one of two things.
You are willingly unprepared, which is not a good excuse and dangerous or you are caught in a situation in which your gear could not be brought along, which is rare.
All of this means I do not like to mess around when it comes to my fire kit and anyone can easily make a similar one as well.
Start With The Container
The container that you choose can be just as important as the tools you put inside of it. This is because the container has two jobs.
It needs to be able to physically protect the tools and gear inside.
And needs to be able to keep the tools and gear dry.
If you can get additional uses out of the container, then all the better but it should fulfill the first two requirements.
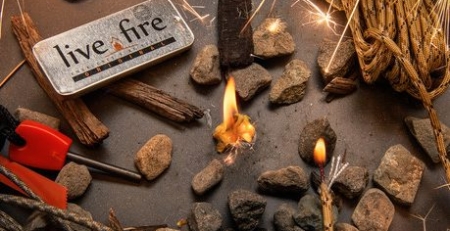
Tins with a lid work well or a dry bag stuffed inside a pack. Heck, I have even used old drill bit plastic containers. You do not have to spend a lot of money on the container as long as it does what it is supposed to, and it works for you.
Making the Kit
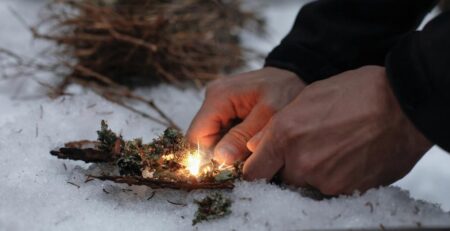
As you prepare to make your kit it is helpful to keep the fire triangle in mind. The triangle reminds us of the three requirements to a successful fire, oxygen, heat, and fuel.
There is an item that can be put into a kit to help aid in airflow, but I will get to that in a bit. The heat is going to be the ignition source and the fuel is going to be the tinder that takes a flame well to get the fire going.
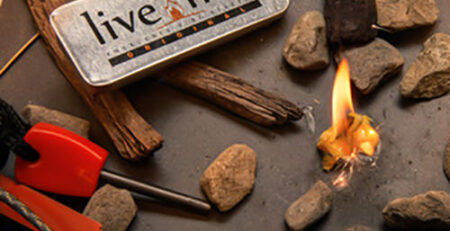
Here are some of the tools that I like to use.
Lighters
Anyone who does not have a lighter as their primary tool for starting a fire is kidding themselves. I have carried a butane lighter every day for almost two decades with minimal problems.
They are cheap, compact, easy to use, and produce an instant flame. Carrying an electric lighter is another option but I tend to use that as a backup.
Notice that I titled this section lighters, as in plural? That is because they are so cheap and compact you should put several of them in your kit.
Stormproof Matches
Forget the free book of matches you can get at a gas station and even the strike-anywhere kitchen matches. I like using both of them at home and for lighting a campfire, but if you are serious about your kit then there is really only one choice, stormproof matches.
Stormproof matches are more expensive and larger than regular matches, but they have massive benefits.
I use Stormproof Matches by UCO and they are completely wind and waterproof, provide a decent burn time, and will continue to burn even when submerged in water.
Ferrocerium and Magnesium Rod
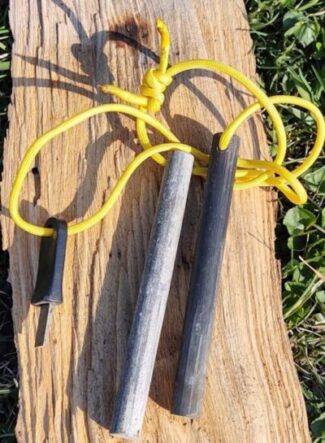
This is my next favorite tool to have because they are one hundred percent waterproof, durable, and a quality rod will last for thousands of strikes.
They come in various shapes and sizes, but I would recommend having a decent-sized one so that it is easier to use when wearing gloves.
Some companies offer magnesium rods or bars that come with their ferro rods, which is a great deal. Where a magnesium bar is useful is in damp conditions because it flares up and burns extremely hot, which gives you an edge in getting a fire started.
Magnifying Glass
This is the last ignition tool on my list, and it often gets a couple of chuckles from other people. This is probably because it has two major pitfalls.
For it to work, there needs to be a clear sunny sky, and because of this requirement, they do not work at night.
But if the conditions are right and you know what you are doing, a person can get a fire going quickly with this tool.
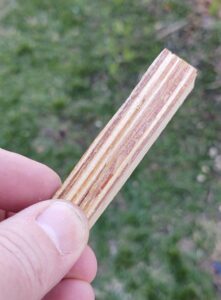
Fat Wood
If you have never used fatwood then you do not know what you are missing. This is one of my favorite aides for starting a fire. I use it in four different ways.
It can be used as a long match but after it is blown out it can be reused several times.
A whole piece can be used to get a fire going. Thin curls can be cut that will provide a decent burn time.
Lastly, a knife or wood saw can be used to create fatwood dust that is incredibly easy to light and burns kind of like a candle wick.
Wax Infused Jute Twine
This is one of the best and cheapest fire starters I have ever made at home and all you will need is some paraffin wax and jute twine.
Cut the wax into small pieces and melt it down. Take caution when melting it because this stuff will catch on fire.
Once the wax is liquified take whatever length of jute twine you want and dip it in. I like to leave the twine in the wax for around thirty seconds and swirl it around a bit. This helps to get the wax inside the fibers.
I then pull the twine out, allow it to cool for ten to twenty seconds, and dip it back into the wax. I repeat this process several times until there is a good coating of wax on the outside of the jute.
The result is a one hundred percent waterproof fire starter that has a long burn time.
Magnesium Shavings
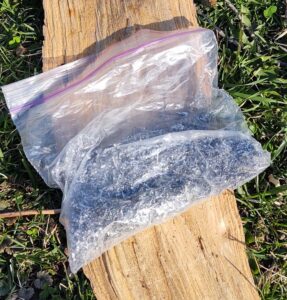
If you have the time and patience these can be made at home by scraping them from a solid magnesium rod or bar. If not, then they can be found online for purchase.
Making a pile of these shavings can be frustrating if it is windy out or your hands are shaking from cold temperatures. So, I like to have a bag or container of them ready to go so that I do not have to mess around with making them in the field. Take caution when storing magnesium shavings because they are highly combustible and burn extremely hot.
Char Cloth
I am not going to fully outline the process of making char cloth at home although it is easy to do. There are a lot of good video tutorials online that you can check out if you are interested in it.
If you do not know, what char cloth is you can simply think of it as “burnt” cloth. Char cloth takes a spark exceedingly well and turns it into an ember that can be used in a tinder bundle.
Almost every time that I have used char cloth with a ferrocerium rod, I only had to scrap the rod once for a spark to take hold.
Premade Tinder
WetFire is a prepackaged fire aid that I have used many times that is easy to ignite and is waterproof. Just because I like WetFire does not mean you have to use it, but I do suggest finding a fire aid that you like and packing it into the kit, such as FireCord.
Homemade fire starters are good but there are some pre-packaged starters that are hard to beat given their resistance to the elements, burn time, and affordability.
Blow Tube
The last item that I have carried in my kit is a hollow metal tube. I do not necessarily view this as a must have item but have found it is useful to have. I utilize it in two ways, to force air into the bottom of a fire and to clear ash away from a dying fire.
Ash prohibits airflow and can suffocate a fire but a fire that has burned down is not necessarily dead. There can be some embers buried beneath that still have some life left. The hollow tube allows forced air to clear away ash and to bring those embers back to life all while keeping your face at a safe distance.
Wrap Up
Well, there you have it. To me, this is one of the best fire kits that anyone can make because it is affordable, easy to make, simple yet extremely effective. Thanks for reading and stay prepared.
Author: Bryan Lynch
Bio: Bryan Lynch grew up in the Midwest and spent every waking moment outdoors. Learning how to hunt, fish, read the land and be self-reliant was part of everyday life. Eventually, he combined his passions for the outdoors, emergency preparedness, and writing. He is an expert contributor over at SurvivalCache.com, where he covers all things survival and preparedness.
